There's a visceral, almost alchemical satisfaction in taking a discarded, forgotten tool and breathing new life into it. Imagine the transformation: a rusty, neglected axe head – a silent testament to forgotten labor – reborn as a gleaming, formidable Viking Axe, a symbol of raw strength, meticulous craftsmanship, and the echoes of Norse heritage. This isn't mere restoration; it's a profound metamorphosis. It's about forging a tangible link to the Viking age through the very act of creation.
This guide will illuminate the path, step-by-step, of turning that timeworn axe head into a Viking-style masterpiece. We'll explore every stage: assessing the raw material, coaxing away the rust, reshaping the steel, crafting a new haft, and even adorning it with those iconic, story-laden Viking details. This is a journey that blends metalworking, woodworking, and a healthy dose of artistry. It is important to note, this is a serious undertaking. Prioritize safety above all else.
Disclaimer: Working with metal and sharp tools carries inherent risks. This guide is for informational purposes only. We strongly recommend prior experience with metalworking and woodworking before attempting this project. Always wear appropriate safety gear, including eye protection, gloves, and a respirator. Work in a well-ventilated space.
Finding Your Foundation: Assessing the Old Axe Head – The Phoenix's Ashes
The quest begins with the search for a suitable axe head. Flea markets, antique shops, garage sales, even your own dusty shed or barn, might hold the key. But not every old axe head is destined for Valhalla. You need a discerning eye.
Think of yourself as an archaeologist, sifting through the remnants of the past. You're looking for an axe head with potential. A felling axe or a splitting maul head generally provides a good starting point. Avoid hatchets or axes with excessively thin blades; they simply lack the necessary material. The steel quality is paramount. Older axes, particularly those forged before the mid-20th century, often boast superior steel compared to many modern, mass-produced counterparts. While a "spark test" (briefly grinding a small area and observing the sparks) can offer a clue about the carbon content – bright, "bushy" sparks suggest high carbon – this requires experience to interpret accurately.
Of course, rust will be present. It's a badge of honor, a testament to time's passage. But avoid axe heads riddled with deep pitting, cracks, or significant damage to the eye (the haft's socket). Surface rust is manageable; structural flaws are not. The size and shape should also inspire you. Visualize the final form. A broader blade with a gentle curve hints at the Viking aesthetic to come. Finally, inspect the poll (the back of the axe head) – it should be relatively intact, offering a solid foundation.
Removing the Rust: Unveiling the Steel Beneath – A Rebirth
With your chosen axe head in hand, the first act of transformation is rust removal. This is a cleansing, a revealing of the hidden steel. Several methods exist, each with its own merits.
A long soak in white vinegar, perhaps 24 to 48 hours, is a gentle yet effective approach. The acetic acid in the vinegar reacts with the iron oxide (rust), loosening its grip. Think of it as a patient chemical excavation. Electrolysis, a slightly more involved process, uses a low-voltage electric current to achieve the same result. It's remarkably effective but requires a setup involving a battery charger, a plastic container, water, and washing soda (numerous online tutorials can guide you).

Unveiling the Steel Beneath – A Rebirth
For lighter surface rust, the direct approach of a wire brush – either handheld or attached to a power tool – can work. However, exercise restraint; you don't want to gouge the underlying metal. Sandpaper, progressing from coarser grits (80-120) to finer grits (220-400), offers another path, smoothing the surface as it removes the rust. Commercial rust removers are also an option, but always follow their instructions meticulously and use them in a well-ventilated area.
Once the rust is vanquished, cleanse the axe head thoroughly with soap and water, and dry it completely. This is crucial to prevent the rust from returning. You're now looking at the bare steel, ready for its next incarnation.
Reshaping the Blade: Forging the Viking Profile – Sculpting Steel
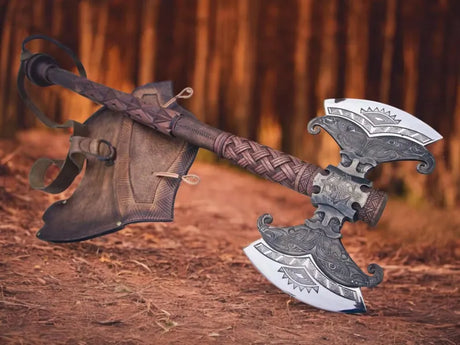
This is where the true metamorphosis begins. You're now a sculptor, but your medium is steel. You'll be reshaping the old axe head, imbuing it with the characteristic Viking profile. This primarily involves creating the iconic "beard" and thinning the blade.
The beard, that distinctive lower extension of the blade below the eye, is a hallmark of many Viking axes. To achieve this, you'll need to grind away metal from the upper portion of the blade, the "cheeks." Think of it as revealing the beard that was always hidden within.
Viking axe blades were often thinner than their modern counterparts, designed for swift, cleaving blows. This requires careful and deliberate grinding, reducing the blade's thickness while maintaining its strength.
The edge geometry also matters. A convex grind, where the edge curves slightly outward, offers a robust and durable cutting surface, ideal for the rigors of Viking-style combat (or, more likely, modern woodworking tasks!).
The primary tool for this reshaping is the angle grinder, equipped with grinding and cutting discs. This is a powerful tool that demands respect. Wear all necessary safety gear, and work with deliberate control. Hand files – mill bastard files, flat files, round files – are your allies for refining the shape, smoothing out imperfections, and removing smaller amounts of metal. A belt sander can expedite the process, but its power requires even greater caution; it's easy to remove too much material too quickly.
The process unfolds in stages:
- Marking: With a marker, meticulously outline the desired shape directly onto the axe head. This is your blueprint, your guide.
- Grinding: Slowly, deliberately, grind away the excess metal, adhering to your marked lines. Imagine yourself as a sculptor, gradually revealing the form within. Frequently quench the axe head in water to prevent overheating, which can compromise the steel's temper.
- Refining: Employ files to refine the contours, smoothing out any rough edges left by the grinder. This is where finesse and patience are key.
- Symmetry: Constantly check the blade's symmetry. A balanced axe is a joy to wield; an unbalanced one is a liability.
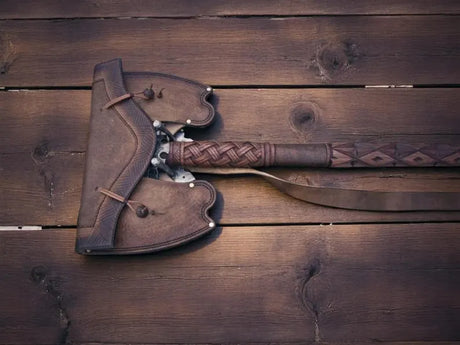
Crafting the Haft: The Heart of the Axe – A Marriage of Wood and Steel
The haft, the handle, is not merely an appendage; it's an integral part of the axe, influencing its balance, feel, and overall effectiveness. A well-crafted haft is a testament to woodworking skill.
Ash is the quintessential wood for Viking axe hafts, revered for its strength, flexibility, and shock-absorbing qualities. Hickory is another excellent choice, offering similar properties. Avoid softwoods; they lack the necessary resilience.

The Heart of the Axe – A Marriage of Wood and Steel
The length of the haft is a matter of personal preference and the axe head's size. A good starting point for a Viking-style axe is typically between 30 and 36 inches (76-91 cm). The shape is crucial: a gentle curve, thicker near the head and tapering to a comfortable grip, is the ideal.
The tools for shaping the haft are a blend of traditional and modern:
A drawknife, a two-handled blade drawn towards the user, is a classic tool for shaping wood. It offers remarkable control, allowing you to remove material precisely and follow the wood's grain. A spokeshave, with its adjustable blade, is perfect for smoothing and refining curved surfaces. Rasps and files, with their varied teeth, provide further control for shaping and removing material. Sandpaper, in progressively finer grits, brings the haft to a smooth, tactile finish.
The process unfolds as a dialogue between the wood and the craftsman:
- Rough Shaping: Begin with a piece of wood slightly oversized. A saw, axe, or drawknife can be used to remove the bulk of the excess material, establishing the basic form.
- Refining the Shape: The drawknife and spokeshave come into their own, allowing you to sculpt the curves and contours of the haft. Feel the wood, follow its grain, and let the shape emerge gradually.
- Fitting the Haft to the Head: This is the most critical stage, a delicate dance between wood and steel. The top of the haft must be meticulously shaped to fit snugly within the axe head's eye. The fit should be tight, but not so tight that it risks splitting the wood. An axe eye drift, a specialized tool, can help to fine-tune the eye's shape, ensuring a perfect union.
- Wedging: Once the haft is fitted, it's secured with a wooden wedge, typically made of a hardwood like oak, driven into the top of the haft. This expands the wood within the eye, creating a rock-solid connection. A metal wedge can be added for extra security.
- Finishing: Sand the haft to a silky smoothness, progressing through finer grits of sandpaper. Finally, apply a finish to protect the wood and enhance its natural beauty. Boiled linseed oil is a time-honored choice, nourishing the wood and providing a water-resistant barrier.
Adding the Details: Viking-Inspired Embellishments – The Soul of the Axe
This is where your artistic spirit takes flight. Here, you can truly personalize your Viking Axe, transforming it from a functional tool into a unique work of art.
- Etching: As we explored in the previous blog post, etching is a quintessential Viking technique for decorating metal. Using acid etching methods, you can create intricate designs on the blade. Practice on scrap metal before committing to the axe head itself.
- Carving: The wooden haft offers another canvas. Geometric patterns, runes (the ancient Viking alphabet), and animal motifs – all are appropriate and evocative.
- Inlay (Advanced): For those with advanced metalworking skills, inlaying contrasting metals (copper, brass, even silver) into the axe head or haft adds a stunning touch of artistry.
-
Leather Wrap: A leather wrap around the grip not only enhances the axe's aesthetic appeal but also improves comfort and provides a more secure hold.
- Staining: You can use wood stains on the haft, highlighting carvings.
Tools of the Trade
This table helps those who do not know the tools, and provides a quick insight.
| Tool | General Description |
|---|---|
| Angle Grinder | Powerful tool for removing large amounts of metal quickly. |
| Files (various types) | For refining shapes, smoothing edges, and detailed work. |
| Drawknife | Two-handled blade for shaping wood, offering excellent control. |
| Spokeshave | For smoothing and refining curved surfaces on wood. |
| Sandpaper (various grits) | Essential for achieving a smooth finish on both metal and wood. |
| Chisels | For carving wood and potentially for detailed metalwork (with appropriate chisels). |
| Carving Tools | Specialized tools for creating intricate designs in wood. |
| Etching Supplies | Acid, resist (beeswax, etc.), and containers for the etching process. |
| Leatherworking Tools | For cutting, shaping, and stitching leather for a grip wrap. |
Safety First: A Constant Reminder – Respect the Tools
Throughout this entire endeavor, safety must be paramount. The tools involved are powerful, and the materials can be unforgiving.
- Eye Protection: Safety glasses or, better yet, a full face shield are non-negotiable when grinding, sanding, or using power tools. Flying debris is a real threat.
- Gloves: Sturdy work gloves protect your hands from cuts, abrasions, and the heat generated during grinding.
- Respirator: A properly fitted respirator is essential when grinding, sanding, or working with chemicals, preventing you from inhaling harmful dust and fumes.
- Hearing Protection: Power tools, especially angle grinders, are loud. Protect your hearing with earplugs or earmuffs.
- Work Area: Maintain a clean, well-lit, and well-ventilated workspace. Clutter increases the risk of accidents.
- Sharp Tools: Exercise extreme caution with all sharp tools. A moment of inattention can have serious consequences.
- Take Breaks: Don't succumb to fatigue. Step away from the project periodically to rest and regain focus.
Addressing Potential Challenges and Alternatives – The Path of Least Resistance
This project is undeniably challenging, demanding both skill and patience. It's essential to be realistic about your abilities and resources.
- Skill Level: This project is best suited for individuals with prior experience in metalworking and woodworking. If you're a beginner, consider starting with smaller, less complex projects to build your skills. Alternatively, seek guidance from an experienced craftsperson.
- Time Commitment: Transforming an axe is not a quick weekend project. It requires a significant investment of time, potentially spanning several days or even weeks, depending on your skill level and the desired level of detail.
- Equipment Costs: While you may already possess some of the necessary tools, you might need to invest in others, such as an angle grinder or specialized woodworking tools. Factor this into your planning.
- Alternatives: If the full-scale transformation seems daunting, consider a modified approach. You could purchase a pre-made Viking-style axe head and focus your efforts on crafting a custom haft, allowing you to hone your woodworking skills without the complexities of metal reshaping.
Real-Life Examples and Inspiration – Learning from Others
I recall witnessing a demonstration by a skilled blacksmith at a historical reenactment. He took a rough, unfinished axe head and, with seemingly effortless mastery, transformed it into a Viking-style weapon. The rhythmic clang of his hammer, the sparks flying from the grinder, the gradual emergence of the form – it was mesmerizing. It was a powerful demonstration of the skill and artistry involved in this craft.
The internet is a treasure trove of inspiration. Explore online platforms like Instagram, YouTube, and dedicated blacksmithing forums. You'll find countless examples of beautifully crafted Viking-style axes, offering a wealth of ideas and techniques. Study the work of others, learn from their successes (and their mistakes!), and let their creations fuel your own.
Expert Advice – Wisdom from the Forge
"Patience is the blacksmith's greatest virtue. Work slowly, deliberately, and let the metal guide you." - Master Blacksmith, Liam Hoffman
"The haft is just as important as the blade. A well-crafted haft will make the axe feel alive in your hands." - Experienced Woodworker, Susan Miller
Conclusion
Transforming an old, rusty axe into a Viking-style axe is more than just a craft project; it's a journey. It's a journey of skill development, a connection to history, and a deeply satisfying creative endeavor. It's about taking something discarded and giving it new purpose, new beauty, and new life. It's about forging your own link to the Viking spirit, one hammer blow, one grind, one careful carve at a time. Embrace the challenge, be patient with yourself, and revel in the process of bringing your own Viking Axe to life! And to further explore the world of Vikings, visit Tales of Valhalla.
FAQs
1. Is this project for beginners?
No. Reshaping an axe head requires metalworking experience, especially with power tools like angle grinders. Beginners should start with simpler projects or focus on hafting a pre-made head.
2. Best old axe head to use?
A felling axe or splitting maul (pre-1950s if possible) with good steel, minimal damage, and a broad blade.
3. Can I skip electrolysis and just use a wire brush for rust?
Yes, for light rust. But electrolysis (or vinegar soaking) is better for heavier rust, minimizing damage to the underlying metal.
4. What wood is essential for the haft?
Hard, strong, and straight-grained wood is essential. Ash and hickory are ideal, but consult a local expert for suitable alternatives. Never use softwood.
5. How to securely attach the axe head?
Precise fitting of the haft to the eye, followed by a hardwood wedge (and optionally a metal wedge) driven into the top of the haft. A tight fit is paramount; adhesive is a supplement, not a replacement.
6. Can I make a good-looking axe without artistic skills?
Yes! Focus on clean shaping and finishing. A well-crafted, functional axe is beautiful in itself. Simple decorations can be added later.